
It also means that if I'm going to start a sewing project that I actually have to put everything away when I stop. Usually I leave it out until either
A: Said project is finished
B: I get bored with said project and start another
It goes both ways equally. The only snag is that my work area also happens to be the kitchen table so if I've covered it in fabric and notions we're forced to find another area in which to prepare meals and snacks and also to eat them. While I can manage daily meals by using the crock pot and t.v. trays until my creativity has exhausted itself I've found that canning takes up a bit more space.
Which (finally) brings me to the whole point of the post. It's just seemed easier to drag out a skein or two of yarn which can easily be put aside when I'm not working with them rather than trying to clean up an entire table's worth of sewing. That means I've been looking for new and exciting ways with which to use the yarn.
Ta Daa! Enter the Kool aid!
I can't believe I didn't think of it myself. I used to dye my hair with this stuff when I was a teenager. I also used to get chased by bees quite a bit afterwards so maybe I had blocked the memories from my mind? I saw a few posts on Craftster: http://www.craftster.org/ about it and after reading some general how to's I decided to give it a go.
After all, what did I have to lose other than a skein of yarn, a few minutes of my time and quite possibly my sanity? Right, nothing I'm going to miss in the long run.
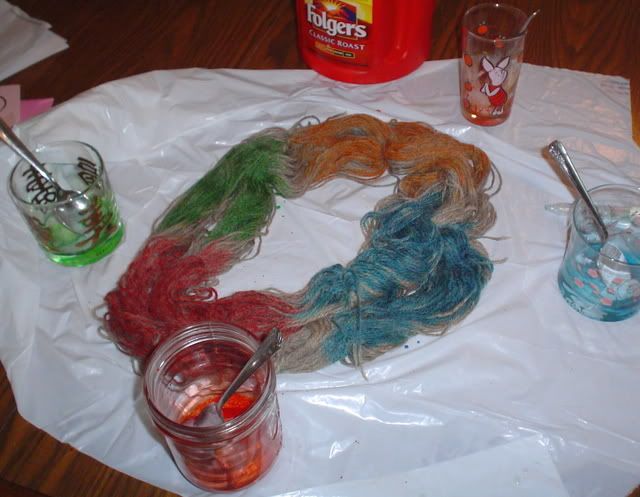
So, I started by completely unwinding and then re-winding a 3 1/2 oz skein of Patons classic Merino wool. While a center pull skein is easier to work with when actually doing a project I figured a hank would be best for dyeing. Don't forget to tie a few strands of yarn loosely around your hank here and there to keep everything neat and tidy during the following steps. Next you need to carefully wash the hank in lukewarm water with a mild detergent and then rinse it thoroughly. You can let the yarn sit in the clear rinse water while you cover your work area with something so you don't end up with an artfully colored table. My covering of choice is a handy and reusable garbage bag. Just turn it inside out when your done with this project and it's good to go, ready to be filled with all the ick you toss into it.
I chose four colors (flavors heh heh) that I hoped would look good together and emptied them into glass containers. Please, no jokes about how horribly mismatched my drinking glasses are. I should be ashamed but instead have deluded myself into thinking it's quaint. Now, it's probably a good idea to avoid inhaling the dust that is bound to puff out every where once you dump out the packages of kool-aid. Not only will you give yourself a headache, you'll also have multi-colored boogers for a while as well. Don't ask me how I know this. I used two packages per color and mixed them with about 4 tablespoons of lukewarm water until the powder was fully dissolved.
Make sure you have some thin gloves for the next few steps unless you like sporting tie dyed fingers. Trust me, it's not as neat as it sounds. Rescue your water logged mass of yarn and carefully squeeze out some of the water. Keep it damp, but make sure it isn't a dripping, sodden mess. I have quite an extensive collection of medicine droppers that hold 1 tbsp of liquid and I used those to apply the "dye" to the yarn. Next you'll need to gently press each colored area to insure that dye penetrates through the underlying strands of yarn. Make sure you rinse your gloved hands off between colors so you don't end up transferring one color to another.
Next I carefully set the entire mess inside a glass dish making sure not to overlap the different colors. I microwaved it for about 2 1/2 minutes, let is sit for 5 minutes and repeated those two steps twice more. Hopefully by now when you press on a section of dyed yarn no color transfers to your finger. That means the kool-aid has been successfully absorbed into the yarn. Once the yarn has cooled some rinse it off with water that is the same temperature as your yarn. Don't use cold water as it will cause it to start felting. After the water runs clears carefully wash it in mild detergents and rinse again. Once you're done doing that gently squeeze out any excess water.

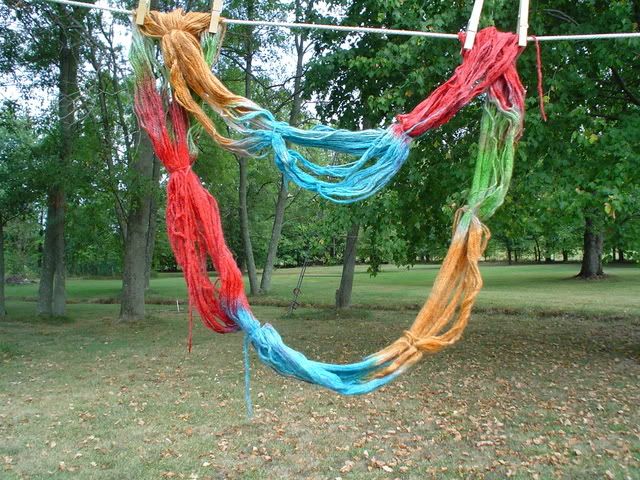
You'll need to hang your yarn up to so that it can dry. I don't recommend using clothespins like I did, but it was breezy out so I knew if I hung it on a clothes hanger it would end up on the ground. It actually dried completely within a few hours but I'm sure that was beginner's luck. The fact that it was 95 degrees outside probably helped too.
Once it had fully dried I brought the yarn inside and proceeded to play around with it a bit trying to decide whether I liked the colors or not. After my many futile attempts at making ugly bracelets and hand warmers (see pic below) I figured I should probably wind everything back up into a ball so I could actually use the yarn for something.
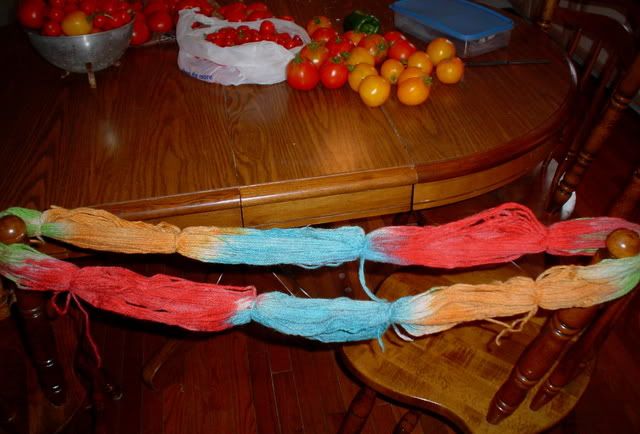
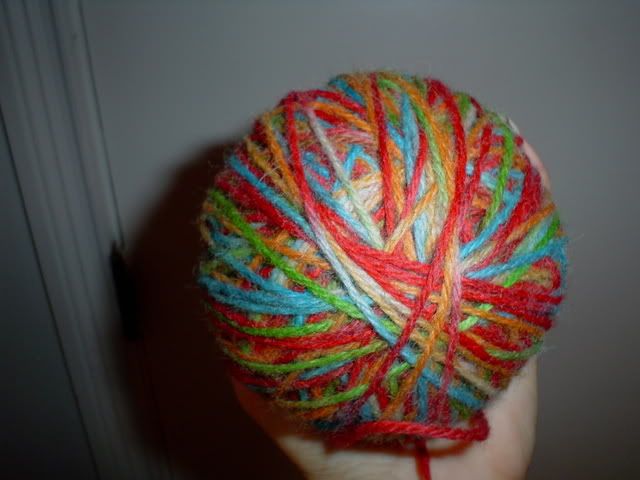
I draped the hank of yarn across a couple of kitchen chairs and begin the loooong, boring and time consuming process of rewinding it. In the background you might notice some of the afore mentioned veggie-tables that are finding their way into every nook and cranny of my house. Yep those innocent looking tomatoes are single handedly responsible for my yarn dyeing adventures.
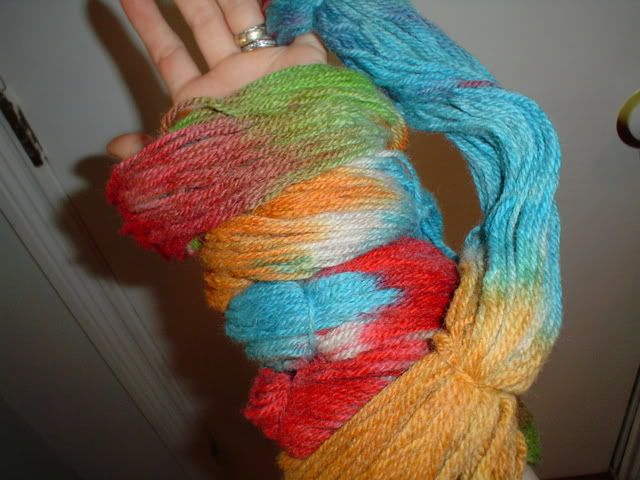
Woot! It's wound! Sloppily, but I have little patience with this sort of thing. I decided I might actually like the colors now that I can see how they look all mixed together like this. Only one more thing to do before I'm certain...
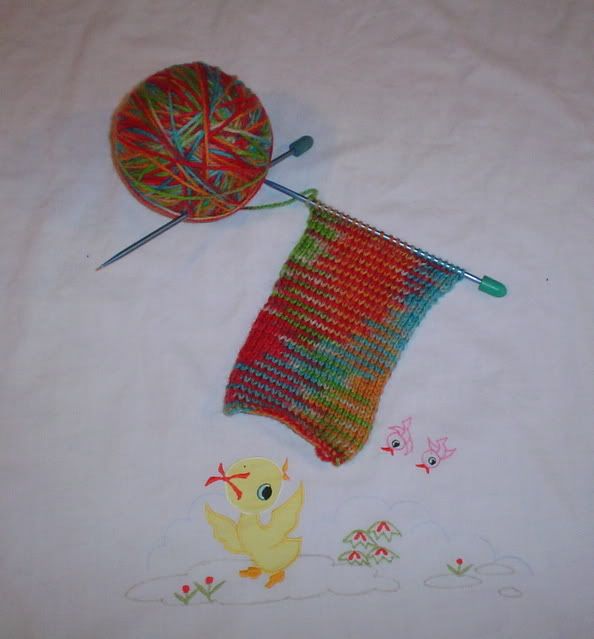
Yep, you got it. I knitted up a sample swatch. I've never actually knit anything. I attempted a scarf last Winter but kept messing it up. Very very frustrating, crochet comes to me much easier than knitting does. I decided though that this yarn deserved to be knitted so I gave it another go. Now I know I love the colors. They're perfect for Autumn. Red, orange and green for the changing leaves. Bright blue for a crisp Fall sky and just a hint of brown here and there to remind me that this is prelude to Winter.
The lil' duck and birds on Anna's blanket seem to be almost as excited about it as I am.
I thought I should add, I did have to unravel my sample swatch. I planned to make a little scarf for Jon but being the novice to knitting that I am I was blissfully unaware that I had made a stockinette stitch. Apparently that particular stitch curls in on itself like crazy and there is nothing you can do to prevent it. I love the simplicity of the stitch though so I'm in the process of trying to rework it using a stockinette stitch combined with other types. In other words I'm just doing a knit here and a purl there and hoping it looks okay once it is all said and done. Wish me luck with that, I'll need it!


No comments:
Post a Comment