Showing posts with label Freebies and Tutorials. Show all posts

Saturday, September 13, 2008

Sushi Pin Cushion (Pincushion?) Tutorial

I had another highly unproductive day yesterday. It's like a bad habit that I just can't kick. Poor hubby. He comes home, looks around and asks "Soooo... what did you do today?"

Me "I made sushi."

Him (suspiciously and hopefully) "Really?! You did?".

Me "Uh. Yeah. I wouldn't say I had if I hadn't would I?"

Him "Yes. Yes you would".

Ha! I proved him wrong! I did make sushi. Unfortunately for him it just wasn't of the eating variety. It was more of the stab it with tiny sharp pointed objects variety. One thing I learned is that my husband is not nearly as interested in the latter variety as he is in the former.

I did document my latest sewing adventure though. I'm not sure why. Maybe because Thing 1 wandered past just as I sat down to sew with my camera in her hands. It worries me when she has anything breakable in her hands so I rescued the camera and then proceeded to become the world's biggest dork. Not only because I actually made a sushi pincushion, but because I documented it as well.

First thing you're going to need to do is decide approximately how big in diameter you want your pincushion to be. Then you'll need find something circular that is roughly the same size to trace. Or you could be all fancy schmancy and use a protractor or something along those lines. I used a vintage mug from the Hippie era. Once you've found your tool of choice trace and cut two circles from a piece of white felt.
Voila!
You have rice.
Bet you didn't know you could make rice this way, did you?


The next step involves math, so don't attempt to do this early in the morning without coffee. You need to multiply the diameter of your rice circle by pi in order to find out it's circumference. Whee!

For those of you who insist on doing this without coffee that means you need to measure across the center of your circle, multiply that by 3.14 so that you know how long around your rice is. Then you need to add another inch to your calculations and write it down somewhere so you don't forget it and have to repeat this step over and over and over and over.... like a certain somebody you know.

Now cut out a green piece of felt that is as long as the above measurement and half as wide. If you came up with (for example) 9 inches in step two then your rectangle should measure 9" by 4 1/2".

Now cut two identical circles and one rectangle out of a good lining fabric. I used a heavy cotton for mine.


Figure out which sides of your felt you want to be the "wrong side" and pin the matching piece of lining to each shape. You could possibly use something like fusible webbing for this step but I didn't because I thought it would leave a minute amount of residue on my pins once the pin cushion was finished and in use.
Next you'll need to take one of the circles and the rectangle and place the right sides together. Sew the circle to the long side of the rectangle. This part is a little tricky depending on the size of your sushi so just keep adjusting it until you get to the end. You should end up with an inch of fabric rectangle left over. Just go ahead and keep sewing that and overlap the first part you sewed on.
Hooray! You have seaweed!


Okay, the above picture I took without the lining on to show you what I was doing. As you can see in the next picture the white thread didn't show up on white cotton very well, which is why I did it that way for a few stitches. Don't do it that way, that was for picture purposes only, I pulled those stitches out and did it the correct way after I took the photo.


Now you need to turn the sushi right side out. Puff your green felt up at the edges just a bit around the white rice circle and do a running stitch around the edge. Make sure you stitch in the ditch of the seam created by sewing the green and white felt to each other. This will form a small lip around your sushi so it doesn't look a puffy tube. You can skip this step if you really want to since it's only for aesthetic purposes anyways.


Just a picture to show you how I'm stitching around the edge of the green and up through the ditch created by the seams. Then take the needle back down through the ditch and repeat til you get to the end.

Next you need to get a few little clips of various colors of felt for your veggies and raw fish. Have fun playing around with it until you find a design that you think resembles real sushi. You'll have to delude yourself a bit for this step, as it's nearly impossibly to make felt resemble raw fish.

Just squint really hard and use your imagination.


Once you've gotten your design the way you like it stitch it onto the right side of your rice circle. You could use matching thread for each piece but I didn't because I didn't want a ton of knots lurking on the under side of my fabric to catch my needles on once I started using the pincushion.


You need to line up the sides of green felt with one side overlapping the other. Fold the lining fabric under slightly and then pin everything in place down the length of the side seam. You'll need to turn it inside out again for the next step.


Roll down the bottom of the green felt and lining until you have your pincushion at a height that you like and pin it all in place. Double check to make sure you have everything even the whole way around or you'll end up with some lopsided sushi once it's all said and done. Next you need to match the right sides of the second white circle/lining to the bottom of your green rectangle and start to sew it together the same as you did for the top.

Only sew it about halfway around for the time being and then stop!


Now that you've gotten your bottom rice circle partially sewn on and you're certain everything is lined up the way it should be go ahead and remove the pins that are along the side seam of felt. These are the pins that are currently inside your project. I left the very bottom pin in mine just to help hold everything in place. Next finish sewing the rest of the way around your white circle to attach it.


Depending on what height you decided for your cushion you may need to trim off some excess green felt and lining material at this point. Just make sure not to accidentally cut into the the actual cushion.

Or your fingers either. That wouldn't be good. You probably wouldn't be able to finish the project if you did that, which would be a tragedy since you've gotten this far.


Okay, now gently pull apart your side seam a bit and poke your cushion into it so you can turn it right side out. FYI: This is probably the easiest step of the whole project


Remember the whole stitch in the ditch thing we did way up there in step... er... 6? I think it was? Well, you get to do it again. It's a little bit harder this time but a little more necessary. It helps to give your sushi a flat bottom so it doesn't wobble all over the place and roll off your work area onto the floor.
Doing this step doesn't guarantee that it won't end up the floor though, especially if you have children, or a kitten, or even if you sneeze. It just helps to prevent it from happening as often.
Unless you have children. If you have children you might as well just get used to the idea of it being on the floor. In fact before you even use it for the first, before you stick even a single pin in it, you should probably toss the cushion onto the floor, kick it around a bit, stomp on it, roll it under the stove and then drop it in the dogs water bowl.
You know, just to sort of get it all out of the way so you don't have to worry about it happening or to waste time futilely trying to prevent it from happening.


Poke just a tiny bit of stuffing inside your sushi to give it a bit of shape. Rearrange your side seam until it looks good remembering to keep the inner lining folded in a bit. Next sew down the seam about 3/4 t0 1 centimeter in from the edge. After you've sewn half way down your seam stop. Now finish stuffing your cushion. Poke in enough stuffing so that it's firm but not so much that it's bursting at the seams. Try to find a nice medium between the two.

Once you've done that finish sewing down the seam and then turn the whole thing and sew back up the side seam to the top. The double line of stitches helps to reinforce the seam but also gives it a neater appearance by hiding whatever little bit of lining that would otherwise be visible.

Knot your thread and trim any loose ends and your done!

Finally!

Annoying little project isn't it?

Now you can take goofy pictures of your creation to show others. If you do this last step don't be surprised if you get an odd look or two. I mean, in all honestly it is a little strange to run around taking photo's of faux cuisine with little pins sticking out of it so you can hardly blame them for looking at you that way.

Tuesday, September 9, 2008

Merino Wool and Kool-Aid Fun!

Okay, so I know that I claim to be more of a seamstress and less of the yarn working type of gal but lately that hasn't been exactly true. With the garden trying it's best to produce all it can before Autumn really sets in I'm practically swimming in veggie-tables these days. That means I've been getting a lot of practice with my newly found love of canning.

It also means that if I'm going to start a sewing project that I actually have to put everything away when I stop. Usually I leave it out until either

A: Said project is finished

B: I get bored with said project and start another

It goes both ways equally. The only snag is that my work area also happens to be the kitchen table so if I've covered it in fabric and notions we're forced to find another area in which to prepare meals and snacks and also to eat them. While I can manage daily meals by using the crock pot and t.v. trays until my creativity has exhausted itself I've found that canning takes up a bit more space.

Which (finally) brings me to the whole point of the post. It's just seemed easier to drag out a skein or two of yarn which can easily be put aside when I'm not working with them rather than trying to clean up an entire table's worth of sewing. That means I've been looking for new and exciting ways with which to use the yarn.

Ta Daa! Enter the Kool aid!

I can't believe I didn't think of it myself. I used to dye my hair with this stuff when I was a teenager. I also used to get chased by bees quite a bit afterwards so maybe I had blocked the memories from my mind? I saw a few posts on Craftster: http://www.craftster.org/ about it and after reading some general how to's I decided to give it a go.

After all, what did I have to lose other than a skein of yarn, a few minutes of my time and quite possibly my sanity? Right, nothing I'm going to miss in the long run.

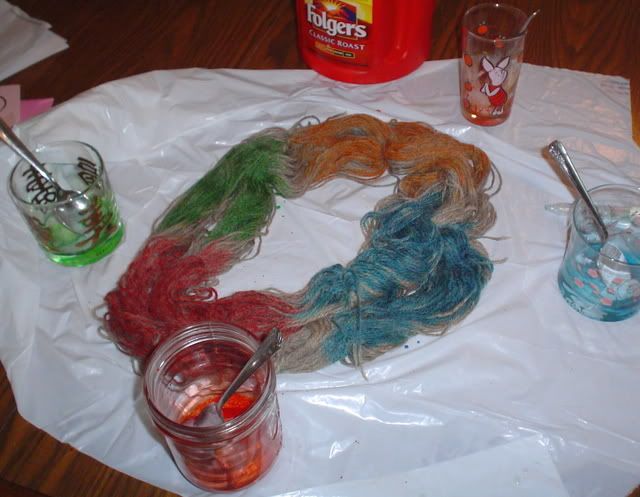
So, I started by completely unwinding and then re-winding a 3 1/2 oz skein of Patons classic Merino wool. While a center pull skein is easier to work with when actually doing a project I figured a hank would be best for dyeing. Don't forget to tie a few strands of yarn loosely around your hank here and there to keep everything neat and tidy during the following steps. Next you need to carefully wash the hank in lukewarm water with a mild detergent and then rinse it thoroughly. You can let the yarn sit in the clear rinse water while you cover your work area with something so you don't end up with an artfully colored table. My covering of choice is a handy and reusable garbage bag. Just turn it inside out when your done with this project and it's good to go, ready to be filled with all the ick you toss into it.

I chose four colors (flavors heh heh) that I hoped would look good together and emptied them into glass containers. Please, no jokes about how horribly mismatched my drinking glasses are. I should be ashamed but instead have deluded myself into thinking it's quaint. Now, it's probably a good idea to avoid inhaling the dust that is bound to puff out every where once you dump out the packages of kool-aid. Not only will you give yourself a headache, you'll also have multi-colored boogers for a while as well. Don't ask me how I know this. I used two packages per color and mixed them with about 4 tablespoons of lukewarm water until the powder was fully dissolved.

Make sure you have some thin gloves for the next few steps unless you like sporting tie dyed fingers. Trust me, it's not as neat as it sounds. Rescue your water logged mass of yarn and carefully squeeze out some of the water. Keep it damp, but make sure it isn't a dripping, sodden mess. I have quite an extensive collection of medicine droppers that hold 1 tbsp of liquid and I used those to apply the "dye" to the yarn. Next you'll need to gently press each colored area to insure that dye penetrates through the underlying strands of yarn. Make sure you rinse your gloved hands off between colors so you don't end up transferring one color to another.


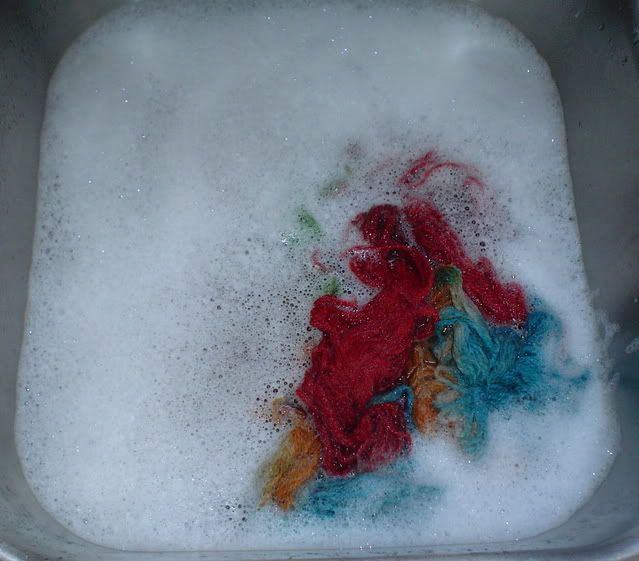
Next I carefully set the entire mess inside a glass dish making sure not to overlap the different colors. I microwaved it for about 2 1/2 minutes, let is sit for 5 minutes and repeated those two steps twice more. Hopefully by now when you press on a section of dyed yarn no color transfers to your finger. That means the kool-aid has been successfully absorbed into the yarn. Once the yarn has cooled some rinse it off with water that is the same temperature as your yarn. Don't use cold water as it will cause it to start felting. After the water runs clears carefully wash it in mild detergents and rinse again. Once you're done doing that gently squeeze out any excess water.

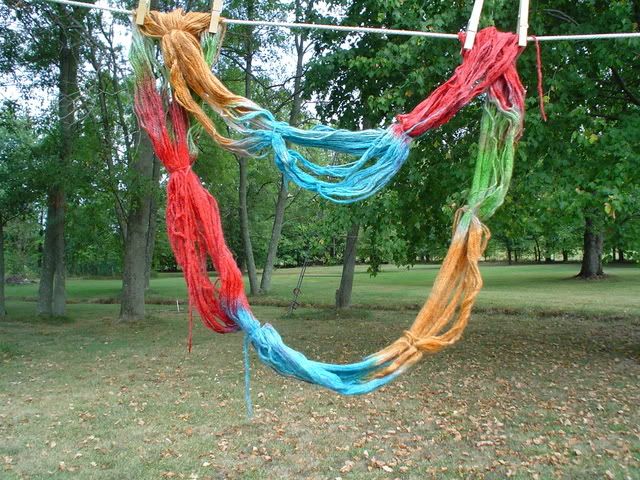
You'll need to hang your yarn up to so that it can dry. I don't recommend using clothespins like I did, but it was breezy out so I knew if I hung it on a clothes hanger it would end up on the ground. It actually dried completely within a few hours but I'm sure that was beginner's luck. The fact that it was 95 degrees outside probably helped too.


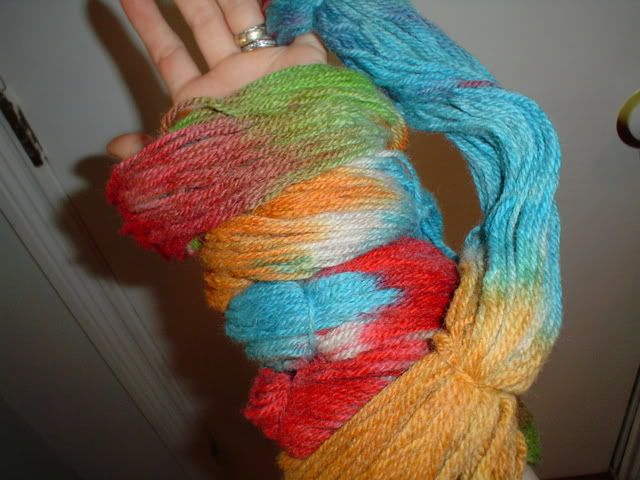
Once it had fully dried I brought the yarn inside and proceeded to play around with it a bit trying to decide whether I liked the colors or not. After my many futile attempts at making ugly bracelets and hand warmers (see pic below) I figured I should probably wind everything back up into a ball so I could actually use the yarn for something.


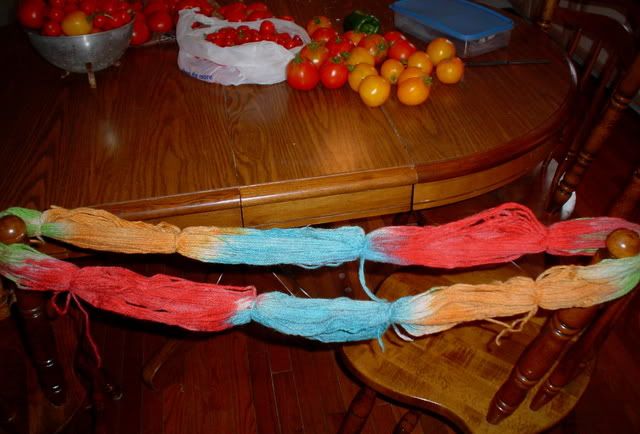
I draped the hank of yarn across a couple of kitchen chairs and begin the loooong, boring and time consuming process of rewinding it. In the background you might notice some of the afore mentioned veggie-tables that are finding their way into every nook and cranny of my house. Yep those innocent looking tomatoes are single handedly responsible for my yarn dyeing adventures.

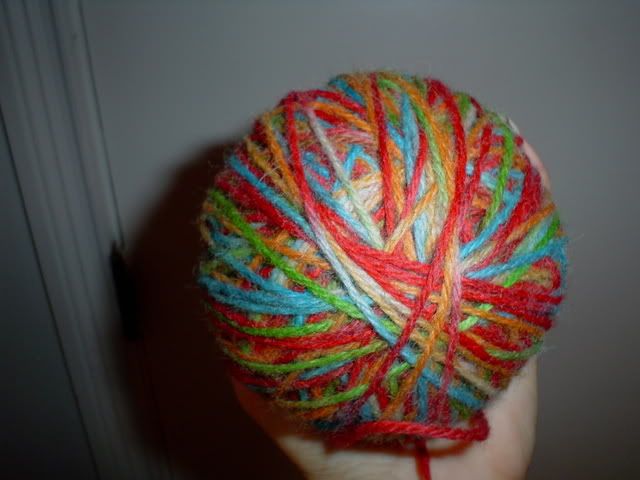
Woot! It's wound! Sloppily, but I have little patience with this sort of thing. I decided I might actually like the colors now that I can see how they look all mixed together like this. Only one more thing to do before I'm certain...

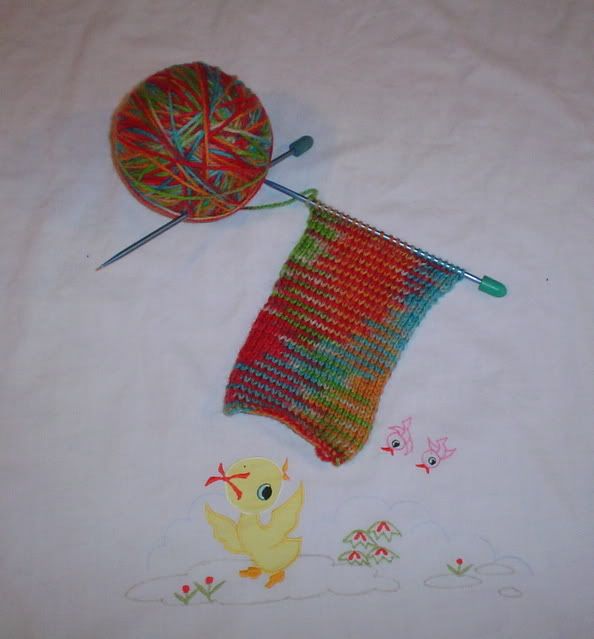
Yep, you got it. I knitted up a sample swatch. I've never actually knit anything. I attempted a scarf last Winter but kept messing it up. Very very frustrating, crochet comes to me much easier than knitting does. I decided though that this yarn deserved to be knitted so I gave it another go. Now I know I love the colors. They're perfect for Autumn. Red, orange and green for the changing leaves. Bright blue for a crisp Fall sky and just a hint of brown here and there to remind me that this is prelude to Winter.

The lil' duck and birds on Anna's blanket seem to be almost as excited about it as I am.

I thought I should add, I did have to unravel my sample swatch. I planned to make a little scarf for Jon but being the novice to knitting that I am I was blissfully unaware that I had made a stockinette stitch. Apparently that particular stitch curls in on itself like crazy and there is nothing you can do to prevent it. I love the simplicity of the stitch though so I'm in the process of trying to rework it using a stockinette stitch combined with other types. In other words I'm just doing a knit here and a purl there and hoping it looks okay once it is all said and done. Wish me luck with that, I'll need it!

Saturday, August 9, 2008

Free Crochet Mushroom Pattern

Today I'm sharing a freebie. Cute and whimsical little mushroom appliques to crochet. Normally anything I do with yarn takes place in the Fall and Winter but I'm taking a sewing break for a little bit and this seems to be the next best thing to do craft wise. Also with the cold weather coming and my love of woodland clothing (full of cute critters and the like) mushrooms seemed like an ideal project.

Unfortunately after searching I couldn't find any directions for shrooms that weren't 3 dimensional so I decided to draft my own. A fellow crocheter (is that a word?) liked the little things so I offered to try and write out the pattern to share with her. Well... since it's already written up I thought I should go ahead and share with anyone interested as well. If you like the design I'd love for you to leave a comment. I'd also like to ask that you don't copy the pattern to claim as your own or to sell. Feel free to make the mushrooms to accent your own items for resale though if you'd like!

This a little grouping of various different ones that I've made. I'm currently writing up patterns for the rest but so far I only have the medium sized completed. I'll try to post the rest of the tutorials soon though so be patient with me.


Close ups. Woot! The rainbow one is made of fuzzy yarn, just so you know. My picture taking abilities are bad, but not that bad. Okay, maybe they are that bad but at least I have an excuse for this one.

One last note before I post the instructions. I have never tried to write out a crochet pattern before, so if you don't understand something or you see that I've goofed somewhere please let me know so I can correct it. Thanks and enjoy!

Medium sized Shroom Top of Mushroom:

Row 1: Chain 4, sc in 2nd ch from hook, sc in next 2 ch ( 3 stitches total) chain 1 and turn (from now on at the end of each row chain 1 and turn work)

Row 2: 2 sc in first sc, 1 sc in next sc, 2 sc in in last sc (5 stitches total)

Row 3: 1 sc in each of the five sc (five stitches)

Row 4: 1 sc in first sc, 2 sc in next sc, 1 sc in next sc, 2 sc in next sc, 1 sc in last sc (7 stitches)

Row 5: 1 sc in each sc (7 stitches)

Row 6: 1 sc in first sc, 2 sc in next sc, 1 sc in each of the next 3 sc, 2 sc in next sc, 1 sc in last sc (9 stitches)

Row 7: 1 sc in each sc (9 total)

Row 8: repeat Row 7 (9 stitches)

Row 9: sc in first sc, decrease once in next two stitches (insert hook into first sc and yo, pull hook through and insert into second sc and yo again. pull hook through yo and pull through all 3 loops on hook), 1 sc in each of next four sc, decrease once in next two stitches (7 stitches total)

Row 10: 1 sc in first sc, decrease once in next two stitches, 1 sc in next sc, decrease once in next 2 stitches, 1 sc in last sc (5 stitches total) 1 sc in each in each of next 5 sc *do not turn work*, continue to work 1 sc in each row up the side of the mushroom, in top 2 sc work 1 sc in first sc, 2 sc in second sc, 1 sc in last sc, continue to sc in row ends down mushroom, slip stitch into the first sc at bottom. Fasten off and weave in ends.

Stem: Row 1: Chain 4, work 1 sc in second sc from hook, 1 sc in each of next 2 sc (3 stitches total) ch 1 turn (as above, continue to ch 1 and turn work after each row)

Row 2: 1 sc in each sc (3 stitches total)

Row 3: repeat Row 2 (3 stitches)

Row 4: 1 sc in first sc, 2 sc in next sc, 3 sc in last sc (four stitches)

Row 5: 1 sc in first sc, 2 sc in each of next 2 sc, 1 sc in last sc (6 stitches)

Row 6: 1 sc in each sc (should be 6 across) *do not turn work* continue to make 1 sc in each row end up the side of the stem, 1 sc in each of 3 sc across top of stem (will make 3 stitches total), 1 sc in each row end down mushroom, slip stitch to first sc. fasten off and weave in ends. Using matching yarn or thread attach mushroom top to stem